Making Wedding Veils Are Easy To Do

.Are you thinking about trying to make your own wedding veil? Making wedding veils are not hard to do.
This is one place you can cut cost in your wedding budget. You will find that learning how to make a veil will save you a lot of money.
Do you need special skills to make a veil?
You will mostly do hand work and a little sewing or gluing. What items do you need when making wedding veils? You need:
- Sharp Scissors
- Hand sewing needle
- Measuring Tape: You can use a vinyl or retractable tape at least 60" length or longer
- Marking pen- I like the air erasable and water soluble markers
- Veil Material: Tulle net or Bridal illusion net in 54", 72" or !08" wide
- Thread
- Sewing Machine
- Glue (some people are handy with a glue gun, but it's hard to make corrections)
- Large table to layout and cut your net. Protect your table with a cutting board
- Plastic or Wire comb
Choosing The Right Length and Width
When Making Wedding Veils
When you make your own veil you have to:
- Determine how long and how wide it should be.
- Decide
on how long you want your wedding veil by placing the tape measure on
you head where you will attach your veil.
- Then let the tape measure fall down your back. If you turn sideways in the mirror, you can have someone point to different length measurements until you find the one you want.
- You can also go by a measurement of a veil you have seen in the bridal shop or online that you think you would like.
The most popular width is 72" wide tulle. It is a medium full width. If you like a full veil, especially if you are using it to make a chapel length or cathedral length veil, I think the 108" width tulle netting is best for a cathedral length veil.
For a really narrow veil 54" wide tulle can be used.
You also must determine how many layers or tiers you want. The most popular choices are the 1 or 2 tier veil. A 3 tier veil is used when a bride has a chapel or cathedral length veil tier that is detachable. When the long layer comes off, the bride will still be left with a 2 tier veil.
Using A Bridal Veil Pattern For Making Wedding Veils
Where can you find bridal veil patterns? You can find them at your nearest fabric store. You can also buy wedding veil patterns online from McCalls , Butterick or Vogue patterns. But you will notice that most companies don't carry many.
Some dressmaking books give instructions on how to make your own wedding veil. But you really don't need a wedding veil pattern. You can cut the tulle the length you want the veil tier and then round the corners. Check out the instructions for making wedding veils below.
Making Wedding Veils With An Edging
 Photo by Irina Iriser from Pexels
When you make your own bridal veil you are limited in putting edging around your veil unless you sew it on. Gluing doesn't work for this. The easiest choice would be not to use an edging. This is call a cut edge wedding veil.
You can add crystals or beads spaced near the edge. In a pattern evenly spaced or random. You can do a random wide spaced all over bead pattern on the veil while it is cut and laying out flat.
You can use glue to put the beads on. Use small pearls or rhinestones picking them up with tweezers. Squeeze out glue on a piece of paper. Dip the bead in the glue and then stick where you want it. Once you place it you can't move it, so be careful!
When making wedding veils, most edgings have to be sewn on. For this it takes patience and skill to work with the tulle. Sewing on a ribbon edge, lace or rattail cord is best done with a sewing machine. The last resort is to sew it on by hand. Do not try to glue it on!
When Making Your Own Wedding Veil Consider Using A Kit
Check your local crafts store or fabric store bridal section. Some carry kits for making wedding veils. You can also find these kits in some fabric stores in the bridal sections. One of my customers told me that some Walmart stores carry the kits.
What's in the wedding veil kits? They come in various widths and lengths. Usually you can find white or ivory bridal veil kits. The edgings are usually the embroidered rolled edging, ribbon and corded. All you need to do is pull the thread at the top edge to gather and then sew on to a comb.
Making A Wedding Veil Using This Bridal Veil Pattern
10 Easy Steps
Making wedding veils can be fun if you follow these easy steps. Get all of your materials together. And let's get started putting this veil together...
- Cut your veil netting the length measurement you
need. Cut all veil tiers at this time. If using a kit, take out the
veiling and follow the instructions included.
- Layer the tiers with the shortest their on top. Match the bottom edges. Fold in half the long way. Now round the bottom edge corners.
- Now is the time to place edging on the veil or accent it with crystals or beads.
- Place the top tier even with the top edge.
- With the edges together, take a needle and thread and do a running stitches across the top, making sure to leave a tail of thread on the end to pull later.
- While making running stitches, you can pull threads so that it gathers up.
- Gather the edge to the width of the comb you will sew or glue this on.
- You can wrap the comb in ribbon or tulle. This will give you a surface to attach the veil to.
- I prefer to whip stitch the veil to the comb. Some will use a glue gun to attach the veil. Only do this if you are use to working with a glue gun. Use a low temp melting glue sticks.
Now you have a veil! You can steam out the wrinkles with a hand held steamer if you need to. This is what makes the netting drape nicely and softer.
Now you have the perfect wedding veil to go with your perfect wedding dress!
As you can see making wedding veils isn't really that complicated. Think of the hundreds of dollars you will save. You also will have a sense of satisfaction knowing you created your wedding veil!
- Home
- Wedding Accessories
- Making Veils
*Click here to read our disclosure regarding affiliate and advertising sponsors.
Book Wedding Dress Consultation Here
Recent Articles
-
How To Pick A Bridal Petticoat
Nov 22, 23 10:31 AM
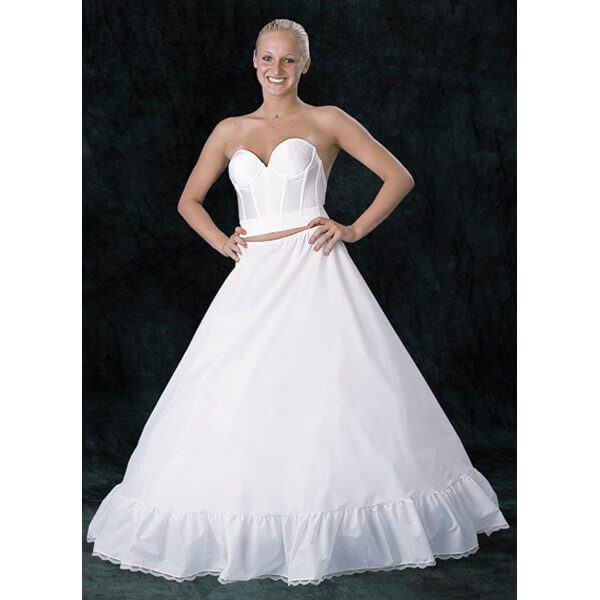 How to choose the right bridal petticoat wedding dress slip for your wedding dress.
 -
Shop Beautiful Black Wedding Gowns
May 11, 23 09:43 PM
 Looking for black wedding gowns? Take a look at these....
 -
FAQ The Mature Bride Want Answers To When Picking A Wedding Dress
Mar 27, 23 05:32 PM
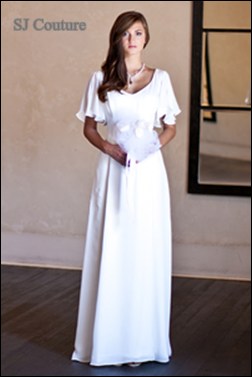 What are the best wedding dress fabrics for the mature bride? What wedding dress styles are best for the older bride? Get the answers to these FAQ
